
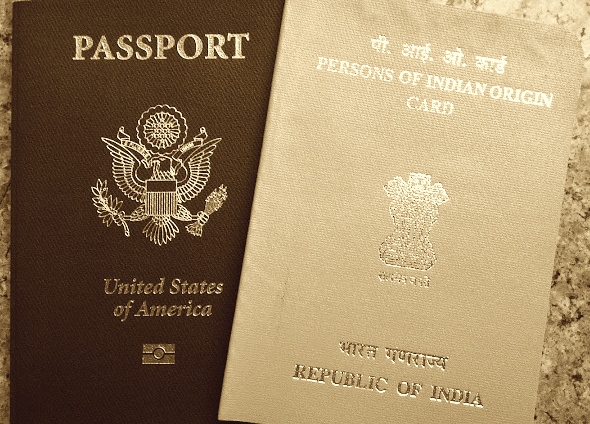

Have you ever dealt with Indian Consulate for processing Visa, Passport at any of the foreign offices? If the answer is YES, then you are familiar with the complications and confusion that exists in the procedures for most of the documentation and applications.
This detailed overview is for PIO application for Minor and is a direct result of my personal experience with the process and dealings with the Indian Consulate at Houston Texas. However, 99% of the application and procedure is very similar and some of the hidden procedures and double meanings in the information provided on their website is quite familiar to most offices in the USA. The Checklist provided by CKGS will guide you to the right documents for the right office.
See below sample of the checklist which specifies the required documents:

See below for the Specific Requirement for specific offices ( Note, it is always a good idea to check on http://www.in.ckgs.us/ for the latest documents and procedures) :
| NON US Passport Holders – New PIO Card – Minor | Forms |
| PIO Application Form – Atlanta | |
| PIO Application Form – Chicago | |
| PIO Application Form – Houston | |
| PIO Application Form – New York | |
| PIO Application Form – San Francisco | |
| PIO Application Form – Washington |
If you follow the procedure in my blog, you will take 50% less time, 80% less frustration and will 100% succeed. It took me several days to put an application together with trail & error. It should take you less than 2 hours if you follow this blog.
Ok. Lets begin.
Important Note:
CKGS (Cox and Kings Global Services) is the company that has won the contract for the INDIA’s diplomatic /passport services since 2014. This is a great news because previously, it was a bigger mess and passports / documents were lost and there was a lot of misinformation.
To know more about the process, go to http://www.in.ckgs.us , but if you have been already there and now want to clear your doubts , then fasten your seat belt..and proceed carefully, read every ‘tip’ on your way.
<<See Examples>> will provide you with a sample of the filled form.
<<Tip>> will help you with easy documentation and clearing doubts.
[ORIGINAL] or [COPY] will indicate the nature of the document.
Lets begin with an example of a two year old child (Minor), born in USA. The Parents are from India, one of parent is on H1B and the other parent is on a H1 dependent Visa (H4), This family lives in Houston, Texas.
<<Tip>>
All the documents will be saved to your local hard drive before we begin, however, I recommend, you download the latest documents from the links provided and save it to a cloud drive such as Google Docs (or drive), Sky drive etc. This way you can re-print, re-edit and trust me, you will do this multiple times. Storing document in the cloud will give you the flexibility to continue working on your document and application.
I am using Google Drive for this example.
The PIO application process is divided into FOUR phases,
Phase 1: Document Creation and Preparation Phase
Phase 2: Filling it out / Paying the Fees Phase
Phase 3: Notarizing the Documents Phase
Phase 4: Mail it in or Submit in Person Phase
Phase 1: Document Creation and Preparation Phase
Create folders as shown in the picture below in your Google drive or local drive (My Documents etc)

CKGS Forms
You will need to download the PDF forms of the documents below :
Always make sure you have the latest forms and information from the CKGS website.
(If you want to download all the blank documents at once, click here for a ZIP)
Forms:
1. Form 1 Checklist (new-pio-card-us-minor)
2. Form 2 PIO Application (houston-application-form)
3. Form 3 Additional Particular (additional-particular-form)
4. Form 4 Declaration & Undertaking (declaration-form)
5. Form 5 Disclaimer ( disclaimer-form)
6. Form 6 Parental Authorization (checklist-parental-authorization-form)
Receipts:
There are two receipts that you will need to attach to your PIO application., they are:
1. Receipt 1 Online Payment Receipt PIO (Click here for explanation). See Example
2. Receipt 2 Online Payment Receipt Courier Service (Click here for explanation)See Example
Your folder will look like this: (Click to Enlarge)

Copies of the Original Documents:
The copies of the original documents consists of scanned (Black/white) of the following documents:
BC: Birth Certificate
DL: Driver License
I797A: The approved I797 document (The H1B Approval of the Parent, note, this was my requirement. If you are a green card holder, then you will create a folder GC, or if you have an EAD, then create a EAD folder. )
PP: Passport Copies
VS: Visa Copies
After creating these folders, scan the following into PDF and save them in the appropriate folders:
Birth Certificate:
Child’s US Birth Certificate [COPY]
Parents: INDIA Birth Certificate [COPY]
State issued Drivers License:
Drivers license for proof of Address for both Parents. [COPY]
I797A Approval for H1B
H1B Visa holders I797 approval document. [COPY]
Passport:
Scan the first three and last two pages of BOTH parent/grandparent’s Indian passport. [COPY]
Child’s Original Passport will need to be attached with the application.[ORIGINAL]
Visa Copies
H1B Visa stamping on the Passport [COPY]
Optionally, also, scan and put the dependent’s H4 stamping this same folder. [COPY]
If you completed all the steps, above and have the copies of the originals and all the CKGS forms and documents (Except for the receipts), then you are ready to go to the Next Phase – Filling it out / Paying the Fees Phase
Phase 2: Filling it out / Paying the Fees Phase
This phase is filled with frustrations and confusion. The questions asked on the PIO applications may be very misleading and sometimes generic. Also, the instructions on the Checklist may not be very clear.
Hence, the best way to make this clear to you, is see my example forms that I have filled out:
Forms:
1. Form 1 Checklist [ORIGINAL] <<See Example>>
2. Form 2 PIO Application [ORIGINAL] <<See Example>>
3. Form 3 Additional Particular [ORIGINAL] <<See Example>>
4. Form 4 Declaration & Undertaking [ORIGINAL] <<See Example>>
5. Form 5 Disclaimer [ORIGINAL] <<See Example>>
6. Form 6 Parental Authorization [ORIGINAL] <<See Example>>
Steps to Pay Online:
PIO Online Payment
1. Go to http://www.in.ckgs.us/
2. Scroll Down to the bottom of the page, to see the Site Map of the website (See below)
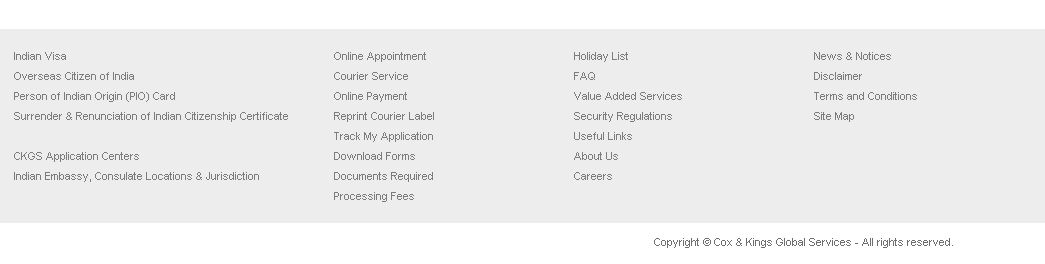
Click to Enlarge
3. Click on Online Payments
4. On this window, you will start selecting the Service, PIO, in this case. Remember, every time you select a choice, the page refreshes, so wait for it to re-load with new options. For next steps, see screen shots below:


5. Print or download the receipt and save it in the CKGS forms folder.
Courier Service Online Payment
1. Go to http://www.in.ckgs.us/
2. Scroll Down to the bottom of the page, to see the Site Map of the website (See below)
![]() Click to Enlarge
Click to Enlarge
3. Click on Courier Service
4. On this window, you will chose State, Service, etc. Make sure you enter the Passport number correctly. This step will only work if you have Paid the PIO application fee. After selection is complete, hit Submit and it should take you to Payment Gateway.

5. Print or download the receipt and save it in the CKGS forms folder.
<<Tip>>
Cover Pages
For your convenience I attached the cover pages of the documents. Make sure you print these and use as place holders. Note: This is not required for PIO application but for your reference. You can discard the cover pages as soon as your application is complete for the next phase. Download it here
Phase 3: Notarizing the Documents Phase
Before we proceed with this step, you will need print all the documents. But before you do, make sure you fill out the documents including the name, dates.
Notary agent is an authorized signatory who has an active license by the national notary public organization. They can be found in Banks, Law firms, public services, your office. It could be a friend or relative.
On the PIO application, where ever it is required ( usually mentioned in the check list) and on the document itself. One easy trick is to make sure you get any document that has parents signature notarized.
Signatures:
Minors
Where ever Minor cannot sign, and there is a rectangle box. The Minor’s thumb print has to be applied. Remember , Left thumb prints for boys and Right thumb print for girls.
Parents
Parents or grandparents signatures have to match the passport signature.
Ink color
Use blue or black ink for signatures and thumb prints.
The best pad for little thumb’s is a gel pad like :
2000 PLUS® Gel-Based Stamp Pad, 2 2/5″H x 4 1/10″W, Black Ink.
http://www.officedepot.com/mb/skupage.do?skuid=939840
Notary Public:
It is recommended that you carry the stamp pad to the notary but practice with your little one on a practice paper.
Both parents will need to sign in front of the Notary.
<<Tip>>
Make sure any dates that you have typed is the current date, so it matches the Notary’s date.
Assuming that you were able to successfully get everything notarized, then you are now on the final phase –Phase 4: Mail it in or Submit in Person Phase.
Phase 4: Mail it in or Submit in Person Phase
You have an option to either mail it in or submit it in person. If you do not live in any of the cities which have an Indian consulate office, then please use the Courier service form CKGS, by using the online payment and then printing the FedEx label. You can then mail it in.
<<Tip>>
- If you live near or in the city where there is an Indian Consulate office, then it is highly recommended that you drop off the application in person. This way, you can make sure that your application is complete and meets their requirements.
- Carry change (25 Cents ) and some loose cash, just in case you need to use their copy machine or print documents.
- Try and arrive at least 15 min before your appointment time but be prepared to wait for 30-45 min.
So, Finally, you have completed the PIO Application. Good Luck.
Note:
- It may take anywhere between 3-6 weeks for PIO to be completed.
- If you application needs more information or the consulate needs you to resend certain document or if the signature does not match etc. They will contact you and you will be able to mail that specific document to them.
If you have any feedback, please leave me a message or comment below. If you have PIO related question, you may ask them here and I will do my best to answer them. However you are better off contacting CKGS for more information.


Leave a Reply